


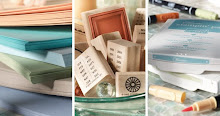
 I posted this picture the other day but said instructions were to follow so here I am. I was "blog surfing" and I saw this beautiful patchwork idea. I looked at it and thought, "wow, someone took a long time on that and look at all the sewing." Well, when I read directions, I saw how easy it was and had to try my hand at it. (I could not find the blog where I saw this so if it was you or you know who it was that came up with this idea please let me know so I can give credit.) I cut a piece of neutral cardstock the size of the Top Note Die for the Big Shot. Then I punched out squares of Raspberry Tart DSP. I used the anywhere glue stick and glued them all down. I put the patchwork through the Big Shot and then used the Basic Black marker to draw stitching (xxx) on the borders. It was so easy! I LOVE how it turned out. This Raspberry Tart DSP is becoming one of my favorites. I am now working on one with the Washington Apple DSP. I will
share when I complete it.
Update: Here is a website to see more instructions for this card. Thank you to Melissa for this information.
http://dianagibbs.typepad.com/stampin_with_di/2009/02/quilt-card-tutorial.html
Keep Stamping,
Katy


Hi Katy, I love this card!! I have made a couple of them myself and plan to make more. I just wanted to pass along the blog that I found the tutorial on. I found it on Stamping with Di's blog http://dianagibbs.typepad.com/stampin_with_di/2009/02/quilt-card-tutorial.html
ReplyDeleteShe is not the original creator but she explains that in her post. Hope this helps.
Happy Stampin!!
Melissa P.,
ReplyDeleteThank you for the information, I will add it to the post.
Katy