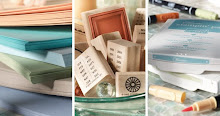
Happy New Year 2010! I chose to do a tea light votive candle decoration for this week's UDI inspiration challenge. I used an old baby food jar that I have been storing just waiting to use. I then cut 2 pieces of card stock vellum into rectangles. I used my new stamp set, Vintage Vogue from the Occasions Mini Catalog(COMING SOON), and embossed in gold onto the vellum. I laid the 2 pieces of vellum on top of each other and punched holes and added brads. Then all you have to do is open the two pieces and slip them over the baby food jar and you have a beautiful decoration. You can also use a glass votive for this project. Be sure to check here to see what the rest of the team came up with.
Thursday, December 31, 2009
Tealight Candle Decor
Happy New Year 2010! I chose to do a tea light votive candle decoration for this week's UDI inspiration challenge. I used an old baby food jar that I have been storing just waiting to use. I then cut 2 pieces of card stock vellum into rectangles. I used my new stamp set, Vintage Vogue from the Occasions Mini Catalog(COMING SOON), and embossed in gold onto the vellum. I laid the 2 pieces of vellum on top of each other and punched holes and added brads. Then all you have to do is open the two pieces and slip them over the baby food jar and you have a beautiful decoration. You can also use a glass votive for this project. Be sure to check here to see what the rest of the team came up with.
Monday, December 28, 2009
Butterfly Blues
Friday, December 25, 2009
Sneak Peak: Occasions Mini
Thursday, December 24, 2009
UDI Inspiration: A Shimmery Christmas/Sneak Peek
Happy Christmas Eve! Here is what I came up with for this week's UDI inspiration Challenge. The gold and glimmer/shimmer spoke to me. It is hard to see but I used Champagne Mist Shimmer paint to shadow my tree. I also used the mist mixed with rubbing alcohol to spritz on my Old Olive sheet. Do you also see the sneak peek? I used a floral stamp from Vintage Vogue (Occasions Mini Catalog) for the embossed image on my Old Olive card stock. I also used the Perfect Polka Dots Impressions folder and flipped it over so the background has sunken dots instead of raised. (This would be a great way to make a golf ball, hmmm.)
Monday, December 21, 2009
Simple Birthday
Friday, December 18, 2009
Peeking at Vintage Vogue
Thursday, December 17, 2009
UDI Inspiration: Decorative Place Setting
I saw this place setting idea somewhere online and could not wait to try it. It is perfect for this week's UDI inspiration! I used my Scallop Circle die for the Big Shot and cut out 2 pieces. One solid color and one Designer Series Paper. I glued them together with the Anywhere glue stick and made a cone. I used Sticky Strip to keep the cone together. I added my label using Vanilla Hodgepodge Hardware. To finish it off I added some candy cane Hershey kisses in a cello bag tied with Real Red 1/4" grosgrain ribbon. This would look perfect on your plate for Christmas. The joy is that you can make it for any occasion.
Wednesday, December 16, 2009
Sporadic Posting
Tuesday, December 15, 2009
Final Teacher Gift!
Monday, December 14, 2009
New Punch Design!
Starting with the new 2010 Occasions Mini Catalog and continuing with all new punch designs going forward, Stampin' Up! has adopted a new body style for our punches! Customer sales period begins January 5, 2010.
A few features of the new punch style:
- Low-profile, rectangular punch body allows for easier stacking and storing
- Punches lock shut for easier storage and transport
- Dual labels on top and end allow for easy identification and selection when stored
- Available in three sizes: small, medium, and extra-large
- New punches allow for larger punched images and more intricate designs while providing greater ease of use.
- Extra -large punch images also allow for two-step designs like the Two-Step Bird punch in the Occasions Mini Catalog
- Corner punches allow you to punch a corner design along the inside edges of a page, not just corners
- larger, whole-hand handle design provides better leverage for easier use
- Available in an exclusive Stampin' Up! color
Part of Stampin' Up!'s commitment to providing demonstrators and customers with the very best crafting tools includes the belief in what we call continuous improvement. Essentially what this means is that even if something works very well, but we see a chance to improve it, we will work to make it even better. While new punch designs will be in the new body style, existing designs will remain in the existing body style for now.
Sunday, December 13, 2009
Scallop Circle Baby Carriage card
Saturday, December 12, 2009
Simple Circle Circus Card
Friday, December 11, 2009
12 Days of Holiday Sales
|
Card Gift Bag
I saw the tutorial by Jodi Collins for this card purse and knew I had to make one. I was surprised at how easy and quick it was to make. We ended up making this in club this month with a matching card (see tomorrows post).
Thursday, December 10, 2009
Inspiration Gift Card Holders
For the UDI inspiration challenge this week I saw the tree and thought of ornaments. I am finishing up teacher gifts and I made these gift card holders to hold a Starbucks Gift Card. Who would not love that? I used the gift card holder from Starbucks and tore it apart, measured and changed it slightly.
- Measure 9 6/8" X 2 7/8"
- Score that card stock at 4 7/16" x 8 15/16"
- Use your bone folder and make the score lines crisp
- Corner round the small scored end and use 2 small pieces of Sticky Strip to the ends and fold it over (this holds your gift card)
- Cut card stock piece 1" x 11"
- Fold around your gift card holder and use Sticky Strip to attach it in the front
- Stamp and image and attach it to the Belly Band covering up the overlapping area